Bits
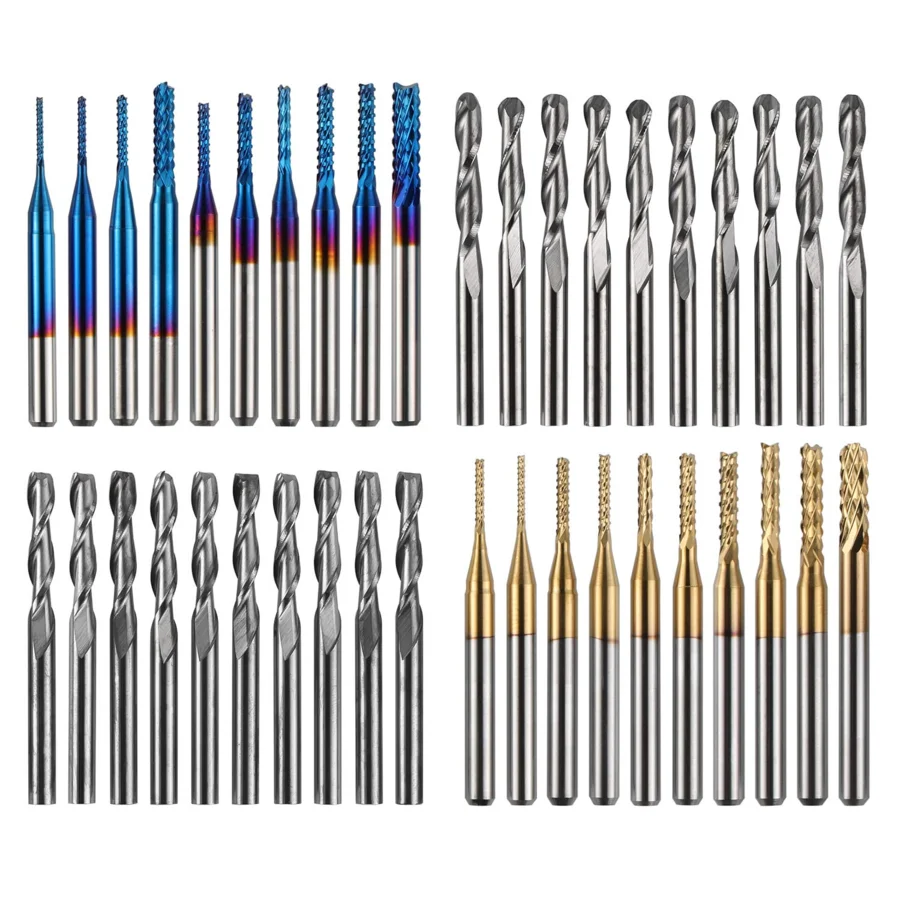
The set of bits we have (Amazon link)
Going clockwise from the top-left: corncob square endmill with "nano blue" coating, ball-nose endmill, corncob square endmill with TiN coating, square endmill
Bits are the spinny things that actually cut the material. As of now, we have a set of 1/8" bits (pictured above), plus a random V-groove bit and 1/4" endmill. We should have a 1/8" center drill too, but I don't know where it is. We bought it recently.
- Square endmill: The most frequently-used one, in my experience.
- Ball-nose endmill: Usually used for cutting smooth 3D shapes, which we almost never do. For regular 2D stuff, it's just worse than the square endmill (have to cut deeper because the tip is rounded and worse plunging performance).
- V-groove bit: For marking or engraving things. I don't know if we've ever used this.
- Center drill: We should have one now? I wanted to use this to mark holes, because regular bits are terrible at cutting FTC-sized holes (we'll get into this later). It's designed for making small and short holes, apparently for a lathe, but can also mark them.
- Spot drill: The proper tool for marking holes. The countersink angle needs to be higher than the bit you're drilling out the holes with. However, I couldn't find a decent one with a countersink angle of ≥135°, which is what our "regular" drill bits are, so the center drill was the next-best option.
In general, endmills aren't designed for "plunging" (going straight down like a drill). In a pinch with soft material, it's not the worst if you're careful, though.
Installing bits
If you haven't noticed already, the CNC router doesn't use a chuck like regular drills. Instead, the bits are placed inside a collet, which is compressed by tightening the black cap with a wrench. The compression leads to the collet gripping the bit.
Replacing bits is fairly straightforward:
- Grip the spindle shaft with a wrench (unpainted, round with two flat spots for the wrench) and remove the collet nut (black) by turning counterclockwise with another.
- The wrenches should be somewhere near the CNC table. I do not know what size they are.
- Remove the old bit from the collet/collet nut assembly.
- Insert the new bit. The back of the bit should be around the back of the spindle. Don't push it so far that the flutes (cutting part of the bit) starts to go into the collet.
- Screw the collet nut back into the spindle. Hand-tight is not tight enough! Use the wrenches.
If the collet has somehow separated from the collet nut, or if you want to change the collet for a different one, reinsertion is a somewhat particular process. For reinserting the collet, this video (timestamped, but the rest is good too) has a good guide:
To remove the collet from the nut, try putting sideways pressure different parts of it until it pops out.
For both removal and insertion, you SHOULD NOT need to use a hammer or similar like some videos online suggest. NEVER put the collet in the spindle and tighten the nut on without snapping the collet into the nut first.